Centos7: 添加bind9的DNS服务


需求

内网需要的服务比较多了,不能都用IP地址来处理相关服务,得搭建个内网的DNS服务器来区分相关业务。

安装bind

这里选择yum直接安装,也可以编译安装使用。

yum install bind bind-utils

配置bind主配置文件

vim /etc/named.conf

// named.conf
//
// Provided by Red Hat bind package to configure the ISC BIND named(8) DNS
// server as a caching only nameserver (as a localhost DNS resolver only).
//
// See /usr/share/doc/bind*/sample/ for example named configuration files.
//
// See the BIND Administrator's Reference Manual (ARM) for details about the
// configuration located in /usr/share/doc/bind-{version}/Bv9ARM.html

options {
        #listen-on port 53 { 127.0.0.1; };
        listen-on port 53 { 127.0.0.1; 192.66.0.113; }; # 这里添加本机地址或者直接any也可以
        listen-on-v6 port 53 { ::1; };
        directory       "/var/named";
        dump-file       "/var/named/data/cache_dump.db";
        statistics-file "/var/named/data/named_stats.txt";
        memstatistics-file "/var/named/data/named_mem_stats.txt";
        recursing-file  "/var/named/data/named.recursing";
        secroots-file   "/var/named/data/named.secroots";
        allow-query     { any; };    # 这里需要注意一下修改成any,要不其他机器不能访问
        forward only;
        forwarders {223.5.5.5;8.8.8.8;}; # 添加上游DNS

        /*
         - If you are building an AUTHORITATIVE DNS server, do NOT enable recurs                                                                                                                                                                                                                                                                     ion.
         - If you are building a RECURSIVE (caching) DNS server, you need to ena                                                                                                                                                                                                                                                                     ble
           recursion.
         - If your recursive DNS server has a public IP address, you MUST enable                                                                                                                                                                                                                                                                      access
           control to limit queries to your legitimate users. Failing to do so w                                                                                                                                                                                                                                                                     ill
           cause your server to become part of large scale DNS amplification
           attacks. Implementing BCP38 within your network would greatly
           reduce such attack surface
        */
        recursion yes;   # 允许向上游查询为yes,反之为no

        dnssec-enable no;  # 安全检查,修改成no。要不会导致未配置的域名不向上游查询,导致查询错误
        dnssec-validation no;  # 安全检查,修改成no。要不会导致未配置的域名不向上游查询,导致查询错误

        /* Path to ISC DLV key */
        bindkeys-file "/etc/named.root.key";

        managed-keys-directory "/var/named/dynamic";

        pid-file "/run/named/named.pid";
        session-keyfile "/run/named/session.key";
};

logging {
        channel default_debug {
                file "data/named.run";
                severity dynamic;
        };
};

zone "." IN {
        type hint;
        file "named.ca";
};

include "/etc/named.rfc1912.zones";
include "/etc/named.root.key";

域名配置

vim /etc/named.rfc1912.zones

// named.rfc1912.zones:
//
// Provided by Red Hat caching-nameserver package
//
// ISC BIND named zone configuration for zones recommended by
// RFC 1912 section 4.1 : localhost TLDs and address zones
// and http://www.ietf.org/internet-drafts/draft-ietf-dnsop-default-local-zones-02.txt
// (c)2007 R W Franks
//
// See /usr/share/doc/bind*/sample/ for example named configuration files.
//

zone "localhost.localdomain" IN {
        type master;
        file "named.localhost";
        allow-update { none; };
};

zone "localhost" IN {
        type master;
        file "named.localhost";
        allow-update { none; };
};

zone "1.0.0.0.0.0.0.0.0.0.0.0.0.0.0.0.0.0.0.0.0.0.0.0.0.0.0.0.0.0.0.0.ip6.arpa" IN {
        type master;
        file "named.loopback";
        allow-update { none; };
};

zone "1.0.0.127.in-addr.arpa" IN {
        type master;
        file "named.loopback";
        allow-update { none; };
};

zone "0.in-addr.arpa" IN {
        type master;
        file "named.empty";
        allow-update { none; };
};

zone "code.ciomp" IN {
        type master;
        file "code.ciomp.zone";
        allow-update { any; };
};
# 添加自己需要配置的域名
zone "ciomp-code.com" IN {
        type master;
        file "ciomp-code.com.zone";  #此为此域名对应配置文件名
        allow-update { any; };
};

域名详细配置

这里注意一下目录,由于主配置中配置了文件夹。相对的域名配置文件直接放在这即可。

vim /var/named/ciomp-code.com.zone

$ORIGIN  ciomp-code.com.
$TTL    600 ; 10 minutes
@   IN SOA dns.ciomp-code.com. dnsadmin.ciomp-code.com. (
                2023062101   ; serial
                10800        ; refresh (3 hours)
                900          ; retry  (15 minutes)
                604800       ; expire (1 week)
                86400        ; minimum (1 day)
                )
            NS  dns.ciomp-code.com.
$TTL    60  ; 1 minute
*       A 10.66.0.11
  • 注意:serial字段在每次修改配置文件时数值+1

启动dns服务

systemctl start named ## 启动dns
systemctl enable named ## 设置开机启动

  • 注意:系统防火墙的53端口记得需要开放出来

检查

dns服务检查

[root@localhost named]# netstat -lntup | grep 53
tcp        0      0 192.66.0.113:53         0.0.0.0:*               LISTEN      7473/named
tcp        0      0 127.0.0.1:53            0.0.0.0:*               LISTEN      7473/named
tcp        0      0 127.0.0.1:953           0.0.0.0:*               LISTEN      7473/named
tcp6       0      0 ::1:53                  :::*                    LISTEN      7473/named
tcp6       0      0 ::1:953                 :::*                    LISTEN      7473/named
udp        0      0 192.66.0.113:53         0.0.0.0:*                           7473/named
udp        0      0 127.0.0.1:53            0.0.0.0:*                           7473/named
udp        0      0 0.0.0.0:5353            0.0.0.0:*                           869/avahi-daemon: r
udp6       0      0 ::1:53                  :::*                                7473/named
[root@localhost named]#

客户端检查(需要将DNS地址修改成DNS服务器的ip)

C:\Users\Administrator>nslookup www.ciomp-code.com
服务器:  UnKnown
Address:  192.66.0.113

名称:    www.ciomp-code.com
Address:  10.66.0.11
Win访问Linux samba拒绝访问(无效句柄)


摘要

samba的环境是Linux下的docker配置的,镜像是dperson/samba,家里的服务器用的一点问题都没有,所里的服务器配置之后同事挂载就会出现【位置不可用,无效句柄】的错误提示,尤其实在访问个文件夹回到根目录的时候就很容易出现这个提示,需要重新挂载才能好使,这样还不如不用。上网查了一下,有说配置文件有问题,有说目录权限有问题,都尝试了一下还是没解决,最后发现是selinux的问题。

问题

屏幕截图 2023-05-31 135250.jpg

解决办法

宿主机处理就可以。SELinux设置自由模式后重启一下smb服务再挂载就好了。。

[root@localhost ~]# setenforce 0    # 将SELinux设置为自由(permissive)模式
setenforce: SELinux is disabled
[root@localhost ~]# setenforce 1    # 将SELinux设置为强制(enforcing)模式
setenforce: SELinux is disabled
[root@localhost ~]#

Linux: 统信的机子输入密码进入不了界面。。


问题

同事说有一台统信(UOS)的机子输入密码进不去界面了。之前就发生过此问题,以为跟一个缺qt库一样的问题。一查看,并不是想象的那样。因为缺qt库的情况是输入密码的界面也会直接卡死没有。这个问题不一样,有输入密码的界面,而且密码输入正确,会无限次输入密码,而且提示了输入正确。
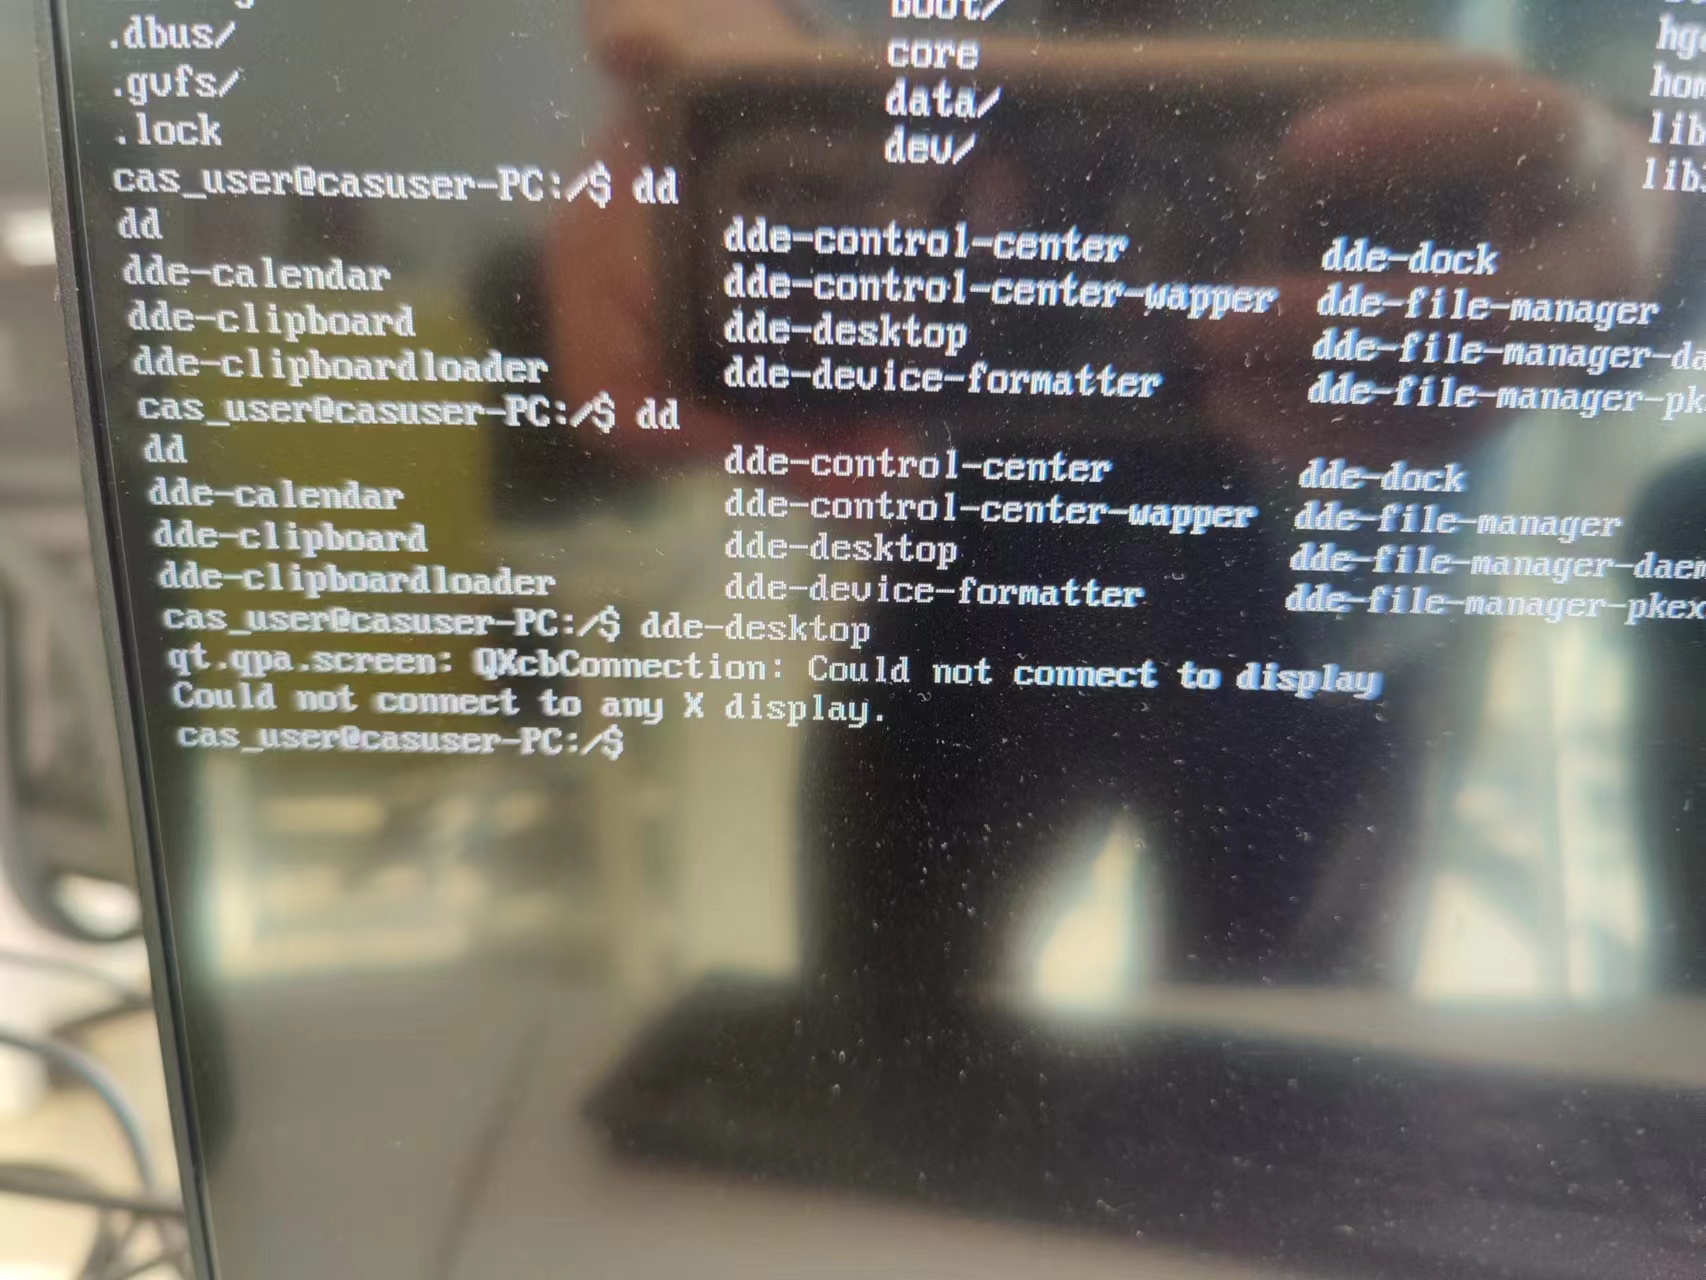
微信图片_20230426074845.jpg

解决过程

Ctrl+Alt+F2进入命令行模式

尝试着在命令行里重启以下桌面,会提示【QXcbConnection: Could not connect to display】,这个问题个之前的统信缺库就不一样的,那只好百度以下。

# 输入账号密码进入命令行
cas_user@casuser-PC:/$ dde-desktop
qt.qpa.screen: QXcbConnection: Could not connect to display
Could not connect ot any X display.
cas_user@casuser-PC:/$

百度出来的解决办法

首先

vim ~/.bashrc
然后在里面添加

export QT_QPA_PLATFORM='offscreen'
即时生效

source ~/.bashrc
这样就可以额

每次修改.bashrc后,使用source ~/.bashrc(或者 . ~/.bashrc)就可以立刻加载修改后的设置,使之生效。
一般会在.bash_profile文件中显式调用.bashrc。登陆linux启动bash时首先会去读取~/.bash_profile文件,这样~/.bashrc也就得到执行了,你的个性化设置也就生效了。

` 其过程就是首先其次再然后。

准备处理

cas_user@casuser-PC:/$ cd ~
cas_user@casuser-PC:/$
# 然后发现居然进不去自己的目录
cas_user@casuser-PC:/$ cd /home && ls -al
cas_user@casuser-PC:/$
总用量 16
drwxr-xr-x  4 root     root     4096 4月  11 19:18 .
drwxr-xr-x 25 root     root     4096 4月  20 03:08 ..
drwxr-x--- 27 root     root     4096 4月  26 07:19 cas_user  # ? 权限咋都是root?
drwxr-xr-x  3 root     root     4096 4月  20 16:59 highgo
cas_user@casuser-PC:/home$ sudo chown cas_user:cas_user cas_user -R
请输入密码:
验证成功
cas_user@casuser-PC:/home$ ls -al
总用量 16
drwxr-xr-x  4 root     root     4096 4月  11 19:18 .
drwxr-xr-x 25 root     root     4096 4月  20 03:08 ..
drwxr-x--- 27 cas_user cas_user 4096 4月  26 07:19 cas_user  # 这回权限才对啊
drwxr-xr-x  3 root     root     4096 4月  20 16:59 highgo

就这么发现问题了,由于用户自己的目录权限变成了root,导致的界面访问不到相关的配置文件导致的进不了页面。那就不用百度的方法了啊。。。。

找找问题是出自哪里

cas_user@casuser-PC:/home$ sudo su
请输入密码:
验证成功
root@casuser-PC:/home# history
···
373  chown -R root:root /home/cas_user
···

???这谁受得了啊,说实话这命令跟rm /* -rf 可能没啥区别,所以我建议尽可能的别用root权限,真的很容易出现问题。


Linux: 编译安装Python指定版本


描述

需要一个指定版本的python,而且需要源码编译。这里用的是3.8.9,不同版本的编译大同小异。

下载指定python版本

python下载地址python38

解压并进入目录

tar xvf python-3.8.9.tar.xz
cd Python-3.8.9

配置及编译

./configure --enable-shared --enable-optimizations --prefix=/home/ciomp/public/python38
make
make install

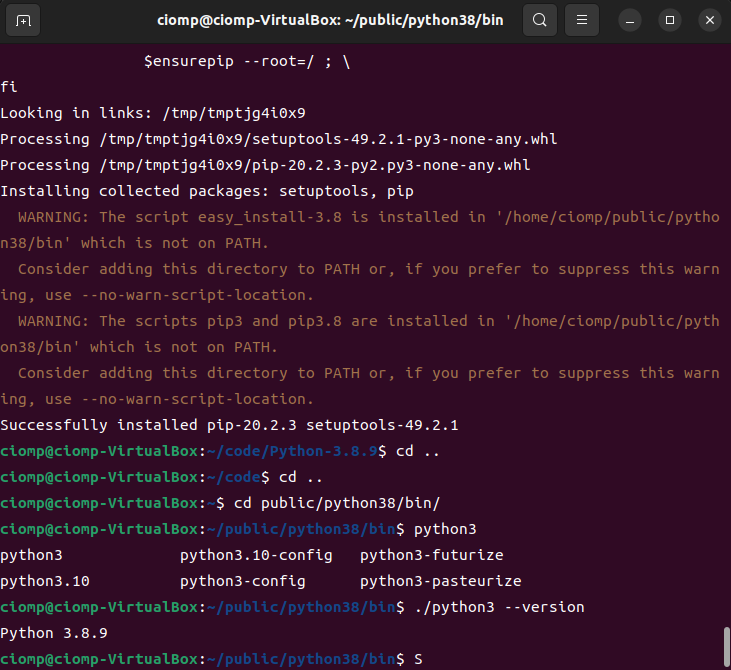
查看结果

屏幕截图 2023-04-18 150608.png


Qt: Ubuntu 22.04 源码编译 Qt5.12.11


需求

想着在linux下编译安装不同版本的qt来配置不同的环境,这样就需要分别源码编译qt的不同版本

下载Qt

去[https://download.qt.io/archive/qt/]找到对应自己想要处理的版本。

Qt 5.12.11官网下载

解压对应的压缩包

tar –xvf qt-everywhere-src-5.12.11.tar.xz

基础环境安装

sudo apt-get install libgl1-mesa-dev libglu1-mesa-dev libxkbcommon-x11-dev libfontconfig1-dev python3 python-is-python3 libxcb-xfixes0-dev libxcb-util-dev

开始配置编译

1 .新建一个Qt的安装目录

mkdir /home/ciomp/public/Qt5.12.11

2 .进入Qt源码目录进行配置和编译

./configure -shared -release -recheck-all -nomake examples -nomake tests -qt-xcb -opensource -confirm-license -platform linux-g++-64 -prefix /home/ciomp/public/Qt5.12.11/

configure配置项说明

-shared 动态编译(.so文件) 还可以用-static配置项来配置静态编译(.a文件)
-release 编译release
-nomake examples 不编译examples
-nomake test 不便宜tests
-opensource 编译开源版本 -commercial商业版本
-confirm-license 自动确认许可证
-platform linux-g++-64 编译器
-prefix /home/ciomp/public/Qt5.12.11/ 安装路径

configure时会有一些报错

qendian.h、qbytearraymatcher.h、qqmlprofilerevent_p.h分别会报一下错误。

error: ‘numeric_limits’ is not a member of ‘std’

  • /home/ciomp/code/qt-everywhere-src-5.12.11/qtbase/src/corelib/global/qendian.h
  • /home/ciomp/code/qt-everywhere-src-5.12.11/qtbase/src/corelib/tools/qbytearraymatcher.h
  • /home/ciomp/code/qt-everywhere-src-5.12.11/qtdeclarative/src/qmldebug/qqmlprofilerevent_p.h

这些文件的代码需要添加一下两个头文件

#include <stdexcept>
#include <limits>

3 .make
make时会也会出现以下错误,也得需要修改一下头文件

convert.cpp:6:56: error: ‘int32_t’ was not declared in this scope

  • /home/ciomp/code/qt-everywhere-src-5.12.11/qtlocation/src/3rdparty/mapbox-gl-native/src/mbgl/util/convert.cpp

这个文件需要添加的头文件

#include<stdint.h>

4 .make install

使用

设置一下环境变量或者直接进入到安装目录下的bin查看一下是否安装成功

PATH=/home/ciomp/public/Qt5.12.11/bin:$PATH
LD_LIBRARY_PATH=/home/ciomp/public/Qt5.12.11/lib:$LD_LIBRARY_PATH
export PATH LD_LIBRARY_PATH
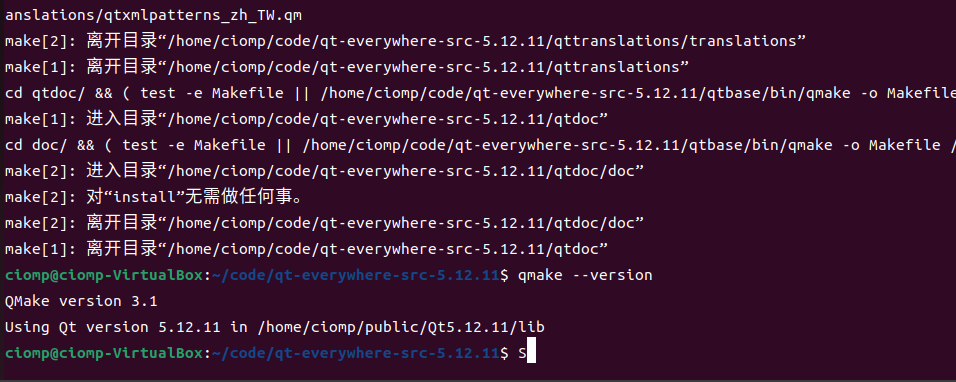
qmake --version

结果

屏幕截图 2023-04-15 112326.png